Key Takeaways
- Pre-built gaming PCs still overcharge you by $300-500 for worse components, building your own is the fix
- A full 1440p gaming rig costs roughly $1,480 right now with specific 2026 parts
- Every first-timer hits the same five assembly mistakes (and they’re all preventable)
- Cable management and BIOS setup are where builds go from “working” to “working well”
- Post-build software, driver setup, and thermal monitoring close the loop
Learn how to build your first gaming PC with this complete beginner guide covering component selection, assembly instructions, and software setup.
$2,100 for a Pre-Built With a Cheap Power Supply Inside
A friend of mine dropped $2,100 on a pre-built gaming PC last fall, and when I opened it up, the power supply was a no-name 600-watt unit I wouldn’t trust to run a toaster. Single-channel RAM. A CPU cooler so small it was thermal throttling within twenty minutes of gameplay. And yet the outside of the box said “premium gaming desktop.” That’s the problem. Pre-built manufacturers cut corners on the parts you can’t see, the stuff that actually determines whether your machine runs well or dies in eighteen months. My friend could’ve built something better for $600 less. He just didn’t know how, and the whole process seemed intimidating.
I’ve heard this from probably 30 or more people at this point. “I’d build my own PC, but I don’t want to break something expensive.” Or: “I watched a build video on YouTube and it looked way too complicated.” So they buy a pre-built, overpay, get worse parts, and call it a day. I get it. The fear makes sense. But it’s wrong. Building a PC is, and I mean this, one of the most straightforward things you can do with expensive hardware. Everything connects in one way. Slots are keyed so you can’t insert stuff backwards. If you can use a Phillips-head screwdriver and resist jamming things that don’t fit, you’re qualified.
I’ve helped over 30 people put together their first gaming PC across the last twelve years. Every single one was nervous before and proud after. And every single one hit the same mistakes during the process: mistakes I’m going to walk you through so you skip the panic entirely.
Attempt One: The “Just Wing It” Approach
Most people who try to build a PC without guidance do something like this. They Google “best gaming PC parts 2026,” find seven different articles with seven different recommendations, pick components from three separate lists, and hope everything works together. Maybe they grab a motherboard that doesn’t support their CPU out of the box. Maybe they buy DDR4 RAM for a DDR5 platform. Or, and this one’s a classic) they pick a GPU that’s physically too long for their case.
Compatibility seems like it should be simple. It isn’t, exactly. AMD and Intel use different CPU sockets. DDR4 and DDR5 use different slots (they’re keyed differently, so you literally can’t install the wrong type, but you can waste money buying the wrong one). NVMe drives come in different generations that work in different M.2 slots. Power supplies need enough wattage and the right cable connectors for your specific GPU. None of this is hard to figure out once someone explains it, but a first-timer juggling all these variables at once? It’s a lot. I’ve seen people spend more time arguing with themselves over part compatibility than it takes to actually assemble the thing.
So here’s what I do for everyone who asks me for help. I give them a specific list. Not “pick something in this price range.” Specific parts, specific models, specific prices. Copy-paste-order. That removes the hardest part of the process — and the part where the most money gets wasted.
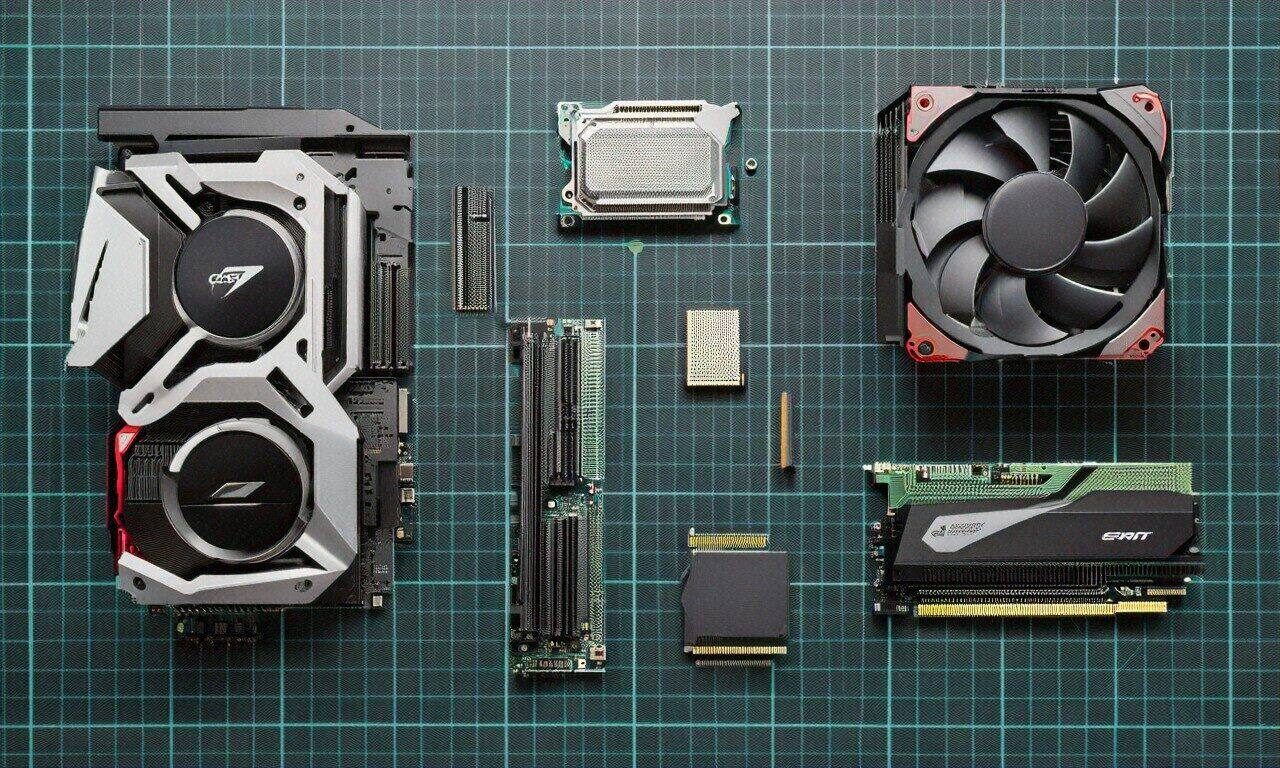
The Actual Parts List: A 1440p Gaming Build for 2026
This build targets 1440p gaming at high frame rates with a budget of roughly $1,400 to $1,600 for the tower alone (no monitor, keyboard, or mouse). Prices shift, obviously, so treat these numbers as early 2026 ballpark figures. But the component choices? Those I’m confident in.
CPU: AMD Ryzen 7 9700X. Around $320
Eight cores, sixteen threads, Zen 5 architecture. For gaming, this chip is the sweet spot right now. You could go up to a Ryzen 9 9900X and spend an extra $200, but the gaming performance difference is minimal; those extra cores matter for video editing and heavy streaming, not for pushing frames in games. What makes the 9700X particularly good for a first build is how cool it runs. You don’t need an expensive cooling solution to keep it happy.
It sits on AMD’s AM5 socket, which the company has committed to supporting through at least 2027. So your motherboard isn’t a dead end. Upgrade the CPU in two years if you want, the board will still work. One thing that trips people up: don’t accidentally order the older Ryzen 7 7700X. Same socket, similar name, worse chip. The 7700X is cheaper, which makes it tempting, but Zen 5 brings about 15% better single-threaded performance and noticeably improved power efficiency. I’ve had two friends order the wrong one because they weren’t paying close attention to model numbers. Check the box twice.
GPU: NVIDIA GeForce RTX 5070. Around $550
This is the part that actually determines how your games look and run. Built on NVIDIA’s Blackwell architecture, the RTX 5070 matches or beats last generation’s RTX 4080, a card that sold for nearly double this price. You’re getting 12GB of GDDR7 memory, real hardware ray tracing that doesn’t tank your frame rate anymore, and DLSS 4 with Multi Frame Generation. That last bit is NVIDIA’s AI upscaling tech, and it can roughly double your FPS in supported games without a noticeable quality hit.
At 1440p, you’re looking at well over 100 fps in demanding stuff like Cyberpunk 2077, Alan Wake 2, and Black Myth: Wukong with settings cranked. It handles 4K too, though you’ll lean on DLSS more heavily there. I target 1440p for these builds because it’s the best balance between sharp visuals and high performance, you don’t need a $1,000 GPU to get a great experience at that resolution.
Quick warning: stock for the 5070 has been spotty since launch. It’s getting better every month from what I’ve seen, but you might need to set up stock alerts with retailers. Don’t pay scalper prices. And don’t fall for the “deal” on an older RTX 4070 Ti at $450: the 5070 is meaningfully faster, uses less power, and has GDDR7 plus the newer architecture. Patience pays off here.
Motherboard: MSI MAG B850 Tomahawk WiFi — Around $200
People overspend on motherboards more than any other component. I tell every friend the same thing: you don’t need a $400 board. Half of them argue with me until I show them benchmarks proving a $200 B850 performs identically to a $400 X870E for gaming. The Tomahawk gives you solid VRM for the 9700X, two M.2 slots, Wi-Fi 7, Bluetooth 5.4, USB-C on the back, and a BIOS that’s actually pleasant to use.
Skip the quad-M.2 slots. Skip the 10 Gigabit LAN. Skip the thunderbolt headers. Unless you’ve got a specific professional reason for those features, you’re burning money. Spend the difference on a better GPU or a nicer monitor; that’s where you’ll actually feel the improvement.
RAM: 32GB DDR5-6000 CL30 (2x16GB). Around $100
DDR5 prices have cratered. This same kit was $180 a year ago and now it’s about $100, which still surprises me. 32GB is the right call for gaming in 2026; some newer titles chew through 18-20GB during gameplay, so 16GB cuts it too close. DDR5-6000 with CL30 timings hits the ideal frequency for AMD’s Infinity Fabric, meaning you get peak performance without touching manual overclocking settings.
Now, here’s something that probably 80% of first-timers get wrong. Your motherboard has four RAM slots. You need to install your two sticks in slots 2 and 4, counting from the CPU. Not 1 and 2. Not 1 and 3. Slots 2 and 4. If you put them in the wrong slots, the system runs in single-channel mode instead of dual-channel, and you lose a big chunk of memory bandwidth. No error message tells you this happened. Everything boots fine, just slower. Check the motherboard manual, there’s a diagram on the first page showing which slots to use. Seriously, look at it. I’ve fixed this mistake at least a dozen times for people who wondered why their brand-new build felt sluggish.
Storage: 1TB NVMe Gen 4 SSD. Around $70
A WD Black SN770 or Samsung 980 Pro, something in that range. Gen 4 is more than fast enough for gaming. Gen 5 drives exist but cost twice as much for a speed difference you won’t notice when loading games. Load times on Gen 4 NVMe are already near-instant. One terabyte holds roughly 12-15 modern games, and when it fills up, adding a second drive takes about two minutes.
Don’t bother with a mechanical hard drive. That whole “small SSD plus big HDD” setup is dead unless you’re storing huge video files. Games on a hard drive in 2026 have noticeably longer load times and can cause texture streaming problems in some titles. SSDs are cheap enough now that spinning disks aren’t worth the noise, the extra cables, or the hassle.
Power Supply: Corsair RM750e. Around $90
750 watts, 80 Plus Gold, fully modular. Total system draw under full gaming load sits around 450-500 watts, so you’ve got comfortable headroom. Don’t cheap out here. A bad PSU can take every component in your system with it when it fails, and the price difference between “reliable” and “sketchy” is maybe $20-30. Not worth the gamble.
Fully modular means you only connect the cables you need. No rat’s nest of unused wires stuffed in a corner. You’ll use the 24-pin ATX, the 8-pin CPU, one or two PCIe cables for the GPU, and maybe a SATA chain if you add extra drives. Everything else stays in the box.
And this part is critical — I’m going to put it in its own sentence so you don’t miss it. Never use power supply cables from a different PSU. Modular cables aren’t standardized. The connector on the component side looks the same across brands, but the pin-out on the PSU side can differ. Using the wrong cable can send 12 volts down a 5-volt line and fry your drive or motherboard instantly. I watched a friend destroy a brand-new SSD this way. Use only the cables that came in your PSU’s box. If you lose one, order a replacement from Corsair specifically for the RM750e model.
Case: Fractal Design North or NZXT H5 Flow. Around $100-130
Good airflow, enough room to work. The Fractal North looks great with its wood panel and has solid thermals. The NZXT H5 Flow is a bit cheaper with a mesh front that lets air flow through freely. Both fit ATX motherboards, have clearance for the RTX 5070 (it’s around 300mm long), and come with pre-installed fans. Avoid small form-factor cases for a first build, your fingers will cramp and cable management becomes a nightmare. Mid-tower all the way.
CPU Cooler: Thermalright Peerless Assassin 120 SE. Around $35
Absurdly good for thirty-five bucks. It’s a dual-tower air cooler that keeps the 9700X well under 80°C during gaming and handles stress tests without throttling. You could spend $80 on a 240mm liquid cooler and get maybe 2-3 degrees cooler temps. For a first build, air cooling wins every time in my opinion: no pumps to fail, no tubes to leak, straightforward installation. Thermal paste comes pre-applied on the base, so you don’t need to buy any separately.
Adding It All Up
CPU ($320) + GPU ($550) + Motherboard ($200) + RAM ($100) + SSD ($70) + PSU ($90) + Case ($115) + Cooler ($35) = roughly $1,480. For a machine that plays every current game at 1440p with high settings and high frame rates. Compare that to the $2,100 pre-built with mystery-brand components. The math isn’t close.
The Five Mistakes You’re Going to Want to Make
I’m not being pessimistic. I’m being realistic based on watching over 30 first-time builders. Almost everyone trips on at least two of these.
Standoffs: The Invisible Disaster
Standoffs are tiny brass hexagonal spacers that screw into the case before the motherboard goes on top. They create a gap between the board and the metal case panel. Without them, the solder points on the back of the motherboard touch bare metal, and you short circuit the whole system. Most modern cases ship with standoffs pre-installed, but not all. Check. Count them. Make sure they line up with your motherboard’s mounting holes. Thirty seconds of verification prevents a catastrophic mistake.
The I/O Shield You’ll Forget
That little rectangular metal plate that snaps into the back of the case before the motherboard slides in. Many boards these days (including the B850 Tomahawk) have it pre-attached, which is nice. But if yours comes as a separate piece, install it first. If you forget, you’ve got to pull the entire motherboard out to add it. The PC works fine without it (it’s just for looks and dust protection, but the annoyance of realizing you missed it after everything’s assembled is its own punishment. Every builder makes this error exactly once.
Front Panel Connectors: Tiny Wires, Big Confusion
At the bottom of the motherboard, there’s a cluster of pins for the case’s power button, reset button, and activity LEDs. The wires are labeled in tiny text, “PWR SW,” “RESET SW,” “HDD LED+,” “HDD LED-.” Everybody struggles here. Pins are small. Labels are hard to read. Getting polarity wrong on the LED connectors just means the lights don’t work (nothing breaks, at least). My advice: open the motherboard manual, find the front panel header diagram, and connect one wire at a time. Some boards include a small adapter block that lets you pre-connect the wires off the board and plug the whole thing in at once. If yours has that, use it. Saves a ton of fumbling.
The Missing CPU Power Cable
Number one reason first builds don’t post. Your motherboard needs two power connections: the big 24-pin ATX cable on the right side and a smaller 8-pin (or 4+4 pin) CPU power cable at the top left. Everyone plugs in the big one. About half of first-timers forget the small one. Without it, the PC simply won’t turn on. Nothing happens. Dead silence. Pro tip: route the CPU power cable through the top-left cable management hole in the case before you install the motherboard. That connector is way easier to reach when the board isn’t in the way.
The First-Boot Panic
You press the power button. Nothing. Or the fans spin for half a second and stop. Your heart sinks. You’re convinced you broke $1,480 worth of hardware. Don’t spiral. This happens on almost every first build, and the fix is usually mundane. Here’s the troubleshooting order I walk people through:
Check that the PSU switch on the back is flipped to ON. (I know. Just check it.) Verify the 24-pin and 8-pin CPU power cables are fully seated — push harder than you think you should, they take real force to click in. Make sure both RAM sticks are fully engaged; you should hear two distinct clicks, one from each latch. Confirm the monitor cable is plugged into the GPU’s video output, not the motherboard’s. And check the front panel power switch connector is on the correct pins. Nine out of ten times, one of those five things is the culprit. I’ve probably done this exact checklist with someone over a phone call at least twenty times.
Cable Management Isn’t Just Cosmetic
I used to think tidy cables were just for showing off builds on Reddit. Turns out I was wrong. Poor cable management restricts airflow, warm air gets trapped around components instead of flowing out through your exhaust fans. Loose cables can hit fan blades and make awful buzzing noises. And if you ever need to swap a component or add a drive, a mess of tangled wires turns a five-minute job into a thirty-minute one.
Route everything behind the motherboard tray. Every modern mid-tower has space back there specifically for cables. The 24-pin, GPU power cables, SATA cables, fan headers, they should all run behind the tray and pop through the nearest rubber grommet to where they connect. Front of the case stays clear. Air flows from intake fans across your components to the exhaust without obstruction.
Use the velcro straps that come with your case. Don’t use zip ties for cables you might rearrange later: velcro is reusable, and you won’t risk nicking cable insulation when you cut a zip tie off in a tight space. I keep a pack of reusable velcro ties in my toolkit and burn through them constantly.
The modular PSU makes this so much easier. With a non-modular unit, you’d have a pile of extra cables crammed somewhere with no purpose. With the RM750e, you only plug in what you need. Fewer cables, less mess, better-looking build with minimal effort.
BIOS Settings That Most Guides Skip Over
Your PC posted. Fans spin, lights come on, and you see the motherboard splash screen. Before you install Windows, go into the BIOS, press Delete during startup (some boards use F2, check the splash screen text).
First thing: enable XMP, or EXPO as AMD calls it. Your DDR5-6000 RAM is currently running at DDR5-4800, the default JEDEC speed. To unlock what you paid for, find the XMP/EXPO setting (usually under “OC” or “Tweaker”), select Profile 1, save, and exit. You’re leaving 20-25% of your memory performance on the table without this. Nobody tells beginners about it, and it takes ten seconds to fix.
Second: confirm your SSD appears. Under storage or boot settings, your NVMe drive should show up. If it doesn’t, the drive might not be seated properly in its M.2 slot, or you forgot the mounting screw. Power down, reseat the drive, try again.
Third: set boot priority. Plug in your Windows USB installer and make it the first boot device. Install Windows. Come back to the BIOS afterward and move the SSD to the top of the boot order. Simple stuff, but it confuses people who’ve never seen a BIOS screen before (which is probably most of you reading this, and that’s completely fine).
Software and Drivers: Closing the Loop
Windows is installed. Now what? First stop: your motherboard manufacturer’s website. For the B850 Tomahawk, that’s MSI’s support page. Download the latest chipset drivers, LAN drivers, and audio drivers. Windows Update grabs generic versions of these automatically, but manufacturer drivers tend to be more recent and more stable. Next, hit nvidia.com and download the latest GeForce driver for the RTX 5070. Don’t use whatever disc might’ve come in the GPU box; it’s outdated the moment it’s printed.
Install Steam, Epic Games Launcher, whatever platforms you use. Then grab HWiNFO64, it’s free, and it lets you monitor temperatures during your first gaming sessions. You want to see the CPU staying under 85°C and the GPU under 80°C with no thermal throttling. If temps look high, the CPU cooler probably isn’t mounted right, or, and this happens more than you’d think, you forgot to peel the protective plastic film off the cooler’s contact plate. It’s a transparent sticker. Easy to miss.
The Questions Everyone Asks Me
“Do I need to buy thermal paste?”
Probably not. The Thermalright cooler has paste pre-applied, and most coolers include a tube in the box anyway. The pre-applied stuff works fine. Aftermarket paste might get you 1-2°C cooler temps. Not worth worrying about for a first build.
“What about Windows, do I need to pay for it?”
You can install and use Windows 11 without activating it. You lose some personalization options (can’t change the wallpaper through Settings, there’s a watermark in the corner), but everything else works normally. A legitimate Windows 11 Home license runs about $110. Cheaper keys exist on various websites, and their legality is.. a gray area. I’ll let you figure that one out yourself.
“Why AMD instead of Intel?”
In early 2026, AMD’s Ryzen 9000 series on AM5 is the better value for most gamers. Intel’s Arrow Lake chips compete on raw performance but run hotter and draw more power. AM5 also has confirmed future CPU support, so the motherboard investment lasts longer. Intel isn’t bad: if you find a deal on a Core Ultra 7 265K with a Z890 board, go ahead. But when I’m picking one platform to recommend to someone building for the first time, it’s AMD right now. Could change by next year, obviously.
“Should I add more case fans?”
Probably not a priority. Most cases include two or three fans, and that’s adequate. Adding an extra intake or exhaust fan might drop temps by 3-5°C, nice, not necessary. If your case only came with two, a matching $10-15 fan on the rear as exhaust is a reasonable add-on. But don’t feel like you need to buy a six-pack of RGB fans before you’ve even turned the thing on for the first time.
What Happens After
Something weird happens once you’ve built your first PC. You start noticing things. A friend shows you their pre-built and you spot the single-channel RAM configuration from across the room. Someone complains about game stuttering and you already know it’s probably a driver issue or an XMP profile that was never enabled. You walk past the “gaming” peripherals aisle at Best Buy and realize half those products are just regular hardware with RGB lights and a 40% markup.
The knowledge compounds. Quickly. Within a few months, you go from “I’m scared I’ll break something” to “let me help you with yours.” I’ve watched this exact arc play out with almost every person I’ve guided through a build. It seems like the barrier is technical, but it’s really just psychological, once you’ve done it once, the mystery evaporates. PC hardware is maybe the most forgiving category of expensive electronics to work with. Components are keyed to prevent wrong installation. Nothing is fragile enough to break from normal handling. And if something doesn’t work on the first try, the fix is almost always just a cable that isn’t fully plugged in.
I’ve been doing this for twelve years and the pattern never changes. Someone’s nervous. We build together. It posts on the second try (rarely the first, there’s always something). They game on it that same evening. Three weeks later they text me about wanting to upgrade the fans or add another SSD. Six months later they’re helping somebody else build theirs.
But I wonder where all of this goes from here. PC building has gotten easier every generation, tool-free cases, pre-applied thermal paste, modular everything. At some point, does it just become snapping five parts together like LEGO? Does that make the hobby more accessible or less interesting? And with AMD and Intel both pushing toward more integrated designs, with GPUs getting more efficient, with AI assistants that can probably walk you through a build in real-time better than I can over a phone call — I honestly don’t know what this looks like in five years. Maybe everyone builds their own PC. Maybe nobody does because the pre-builts finally get their act together. Hard to say. But right now, in early 2026, building your own gaming rig is still the best way to get the most performance for your money, and the process of doing it teaches you something that watching a YouTube video never quite can. So grab a screwdriver. Order those parts. And see what happens.


(0) Comments